
Step by Step guide to creating your own NFT — CryptoPunks or Pudgy Penguins
NFT stands for non-fungible token, it can represent ownership for a digital asset. NFT can take the form of an in-game item for GameFi (play-to-earn application), or a digital art piece, or even as PFP like CryptoPunks.
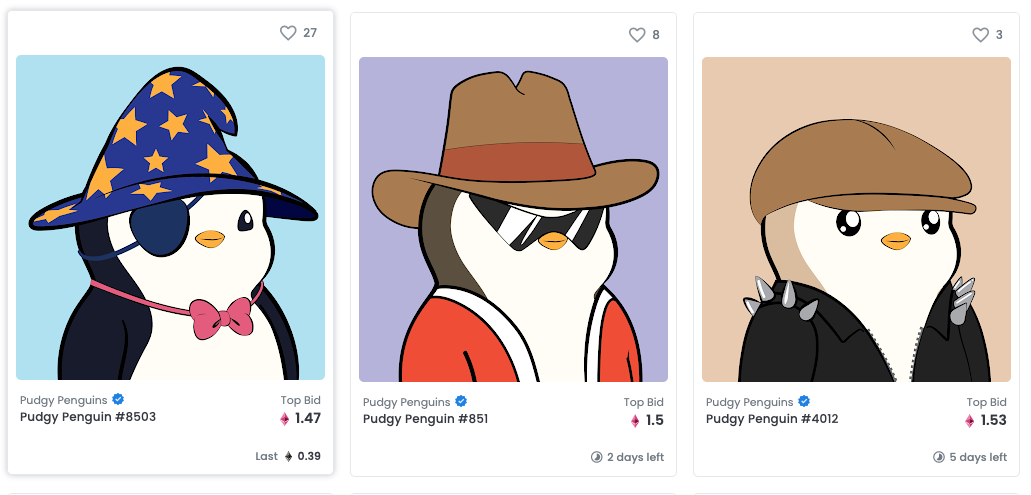
What is CryptoPunks or Pudgy PenguinsIf you have chanced into this blog post, chances are you know what NFT is and have landed here after googling. Both CryptoPunks and Pudgy Penguins belong to the PFP (profile picture) category. They usually come in a huge number of editions, in the thousands at least. The idea is to programmatically generate an avatar for each edition with different traits such as Head, Face, etc.. with some of the editions having the rarer traits, which might be valued higher. Users then buy the NFT and likely use the image as their social media profile picture.
If you have never heard of Crypto Punks or Pudgy Penguins,
View CryptoPunks collection at https://opensea.io/collection/cryptopunks— most of the punks are currently last traded at 6 digitis and above at the time of this blogpost.
And for Pudgy penguins — https://opensea.io/collection/pudgypenguins
Step by Step guide
The next section describes a step-by-step guide for individuals who are keen to know the steps to create a PFP project. You will need to have a programming background to perform the steps. If you followed the guide, your edition should eventually be available on OpenSea eg. https://testnets.opensea.io/collection/pokerface-v2.
On a high level, these are the steps required:
- Generate the NFT images and meta-data for OpenSea
- Host the image and meta-data on either IPFS or somewhere else
- Deploy the smart contract
- Mint NFT
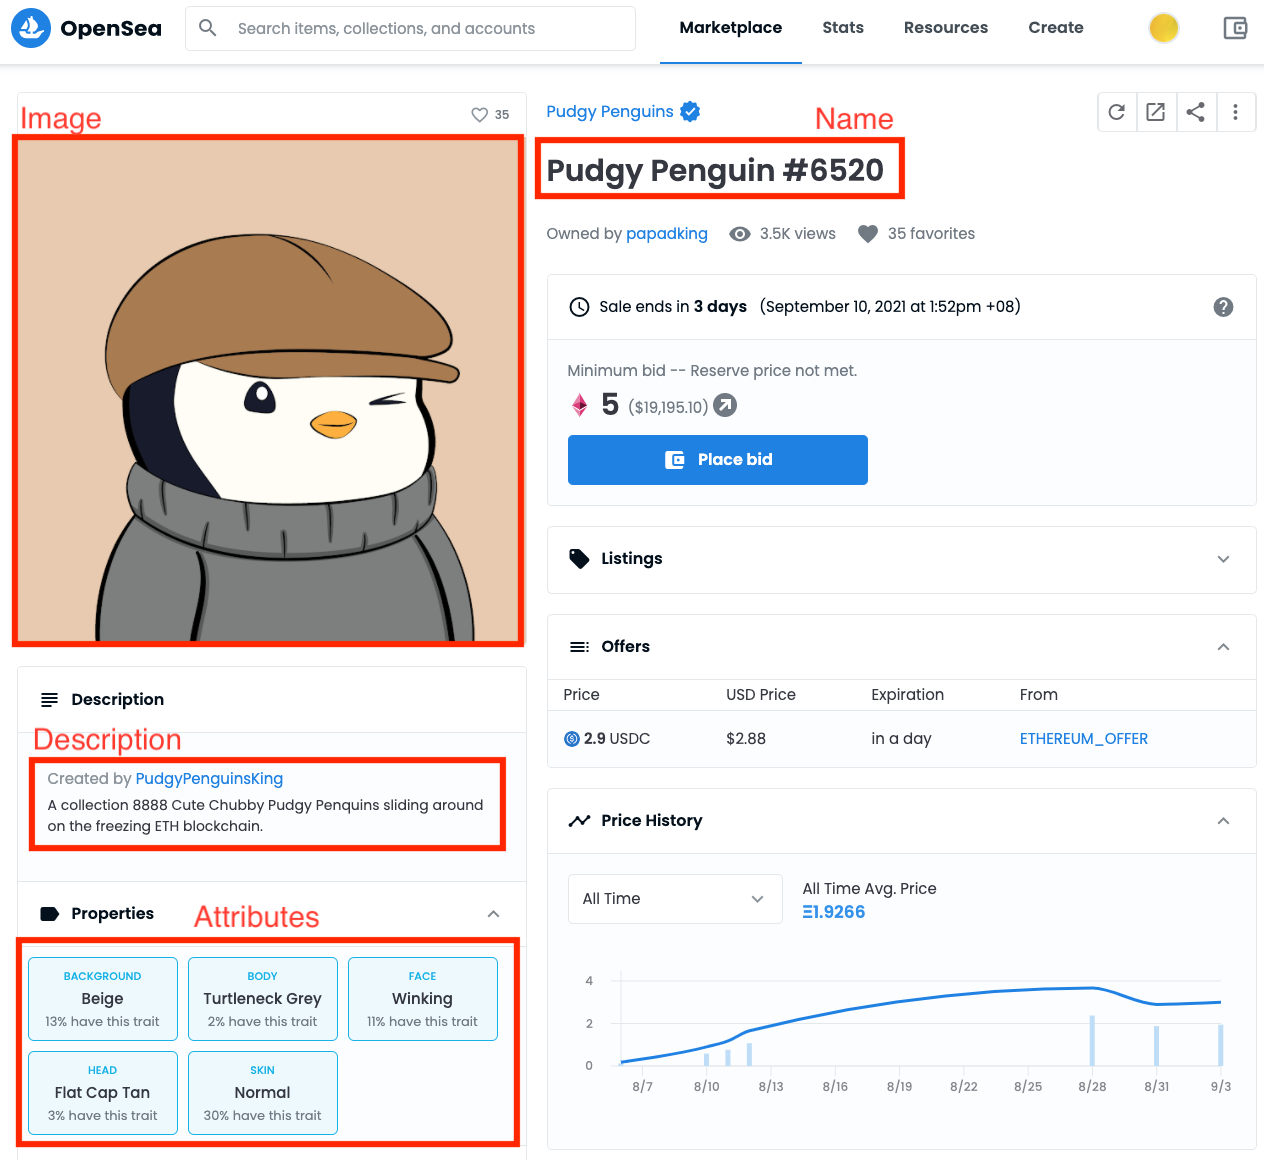
From OpenSea documentation, there are 4 attributes required for each NFT, this would be used by OpenSea to display information about each NFT.
Example:
{
  name: "Pudgy Penguin #6520",
  description: "A collection 8888 Cute Chubby ...",
  image: "https://api.pudgypenguins.io/penguin/image/6520",
  attributes: [
    { trait_type: "Background", value: "Beige" },
    { trait_type: "Skin", value: "Normal" },
    { trait_type: "Body", value: "Turtleneck Greuy" },
    { trait_type: "Face", value: "Winking" },
    { trait_type: "Head", value: "Flat Cap Tan" }
  ]
}
The above meta-data will map to this Pudgy Penguin on OpenSea
In this step, we’ll leverage the https://github.com/NotLuksus/nft-art-generatorlibrary to help us randomly generate NFT images and their metadata.
Pre-requisite
In order to generate an NFT with random traits, the project creator has to prepare the image for each different trait such as eye, head, etc.. I’ve pre-generated those traits at https://github.com/steve-ng/pokerface-nft/tree/main/assets/images for you to keep this simple. Pardon my drawing — I'm a software engineer with 0 artistic talent.
Follow the commands below to generate an NFT image
// Installation steps
> git clone https://github.com/steve-ng/pokerface-nft
> cd pokerface-nft
> yarn
> npm install -g nft-art-generator// Generate assets
> cd assets
> nft-generate
There will be a ton of questions in the terminal during nft-generate, you can set the image urlas some random URL for now as we need to perform step 2 to get a URL first and come back to this step.
The below are the value I’ve keyed in.
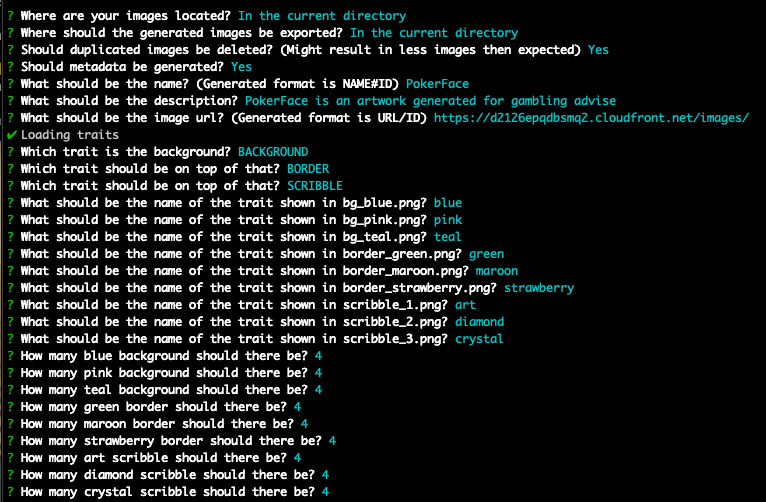
By the end of nft-generate the command, you should see a output folder created with different NFT assets and a metadata.json file. metadata.jsonis an aggregate of all edition information and I’ve split them into metadatafolders.
If you would like to skip this step, you can find the result in the output folder at Github. there are already 12 assets generated randomly and the metadatafolder with the metadata for the 12 assets.
Step 2: Host the image and meta-data
I am using AWS to achieve this, the outcome should be as follows. For numbers 0 to 11, they will be available at
- Metadata: https://d2126epqdbsmq2.cloudfront.net/info/{number} eg. https://d2126epqdbsmq2.cloudfront.net/info/1
- Image: https://d2126epqdbsmq2.cloudfront.net/images/{number}.png eg. https://d2126epqdbsmq2.cloudfront.net/images/1.png
Create an s3 bucket and:
- Create a folder of images and upload everything in the output folder
- Create a folder called info and upload everything in the metadata folder
- Either make your S3 bucket public, so that the link are accessible publicly, or create a Cloudfront that maps to this S3 bucket. Cloudfront is a CDN and will give better performance for the end-user if this image is looked up often
I’ll keep this step brief and end here as there are many ways to host, some PFP projects host their asset at IPFS which comes with its pros & cons as well.
By the end of this step, you should have the imageUrl eg. https://d2126epqdbsmq2.cloudfront.net/images/ — you can now go back to step 1 nft-generate and be able to key in the value for image url
Step 3: Deploy the smart contract
I’ve forked Pudgy Penguin contract over here https://github.com/steve-ng/pokerface-nft/blob/main/contracts/PokerFaces.sol It is pretty straight-forward to understand and follows ERC-721 standard. Explanation of the smart contract is out of this article’s scope.
Pre-requisite
You need to have a private key and some ether in Rinkeby network:
- Generate private key: https://vanity-eth.tk/ — note this should be just for testing, never trust an online key generation tool.
- Get some ether https://faucet.rinkeby.io/
Run the following commands to deploy
// From pokerface-nft folder
> export PRIVATE_KEY=xxxx
> truffle migrate --reset --network rinkeby
After the command is done, you should see something like the following in the terminal:
> contract address: yyy
You can now view your contract at Etherscan: https://rinkeby.etherscan.io/address/yyy
Usually, you would verify the contract from Etherscan, however as I’ve verified it previously for the same contract, you do not need to verify.
Step 4: Minting some NFT and viewing at Opensea!
With the contract deployed, we can start minting NFT!
Mint NFT
- Proceed to your Etherscan contract
Contract -> Write Contracttab - Make sure your metamask is on
Rinkebynetwork and connected, select mint function and key in the following information:
mint: 0.36
_to: <<your address>>
_count: 12
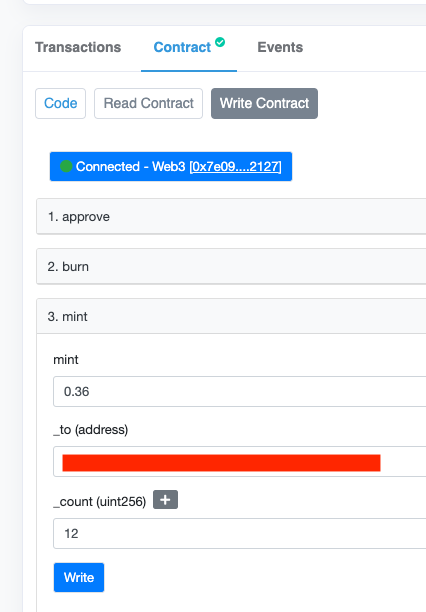
0.36 ETHas each penguin is 0.03 eth (the original price back then, you can imagine the gain those early folks made). And 12 count as we have created 12 different assets in Step 1.
If you have done it correctly, you can now view all your assets at OpenSea on the following page https://testnets.opensea.io/assets/{contract_address}/1
eg my PokerFace NFT can be found here https://testnets.opensea.io/assets/0xe24f0717fedbecb57651cbe3dd4b8b73c5b89a57/1
Usually there would be a nice website and provide a UI for users to mint their NFT, What we did is to simply mint all the edition for ourself for testing purpose.
Conclusion
I hope you guys find this article useful as an introduction to how these PFP NFT are created. We are barely scratching the use case of NFT and I’ll be reflecting a few years from now back to this blog post on how much things would have changed by then.
If you would like to support me, do sign up for my referral link for crypto exchanges, both of us will get some rewards.
Credits
Join Coinmonks Telegram Channel and Youtube Channel learn about crypto trading and investing


0 Comments