
How to deploy a smart contract to Polygon Mainnet
…how I deployed a smart contract and minted 2 NFTs on the real, live, main network, Polygon blockchain for a grand total of .25¢!!
I entered the web3 rabbit hole by completing the Epic NFT project on buildspace. The project is amazing — it teaches you how to deploy a smart contract to the Ethereum Testnet and use it to mint NFTs.
But… my curiosity wasn’t quite satisfied.
I was missing something. I wanted my contract on a real, live, production blockchain — not just a test network. I considered deploying to the main Ethereum blockchain but I didn’t want to pay expensive gas fees for a starter project.
Enter Polygon — a layer 2 Ethereum solution with cheaper transaction costs. And boy, did it live up to that promise!
I’ll show you how I deployed a smart contract and minted 2 NFTs on the real, live, main network, Polygon blockchain for a grand total of .25¢!!
What we’ll cover today
I’ve broken our deployment down into 5 easy steps.
Connect your MetaMask wallet to Polygon MainnetAdd Polygon tokens to your wallet
Create a Polygon node/app
Edit hardhat config
Run compile/deploy commands
Let’s get started!
Prerequisite: Finish the Epic NFT project buildspace (we’ll be deploying the code we wrote for that project).
1. Connect your MetaMask wallet to Polygon
First things first. We need to connect our wallet to the Polygon network.
It’s a simple 3 step process:
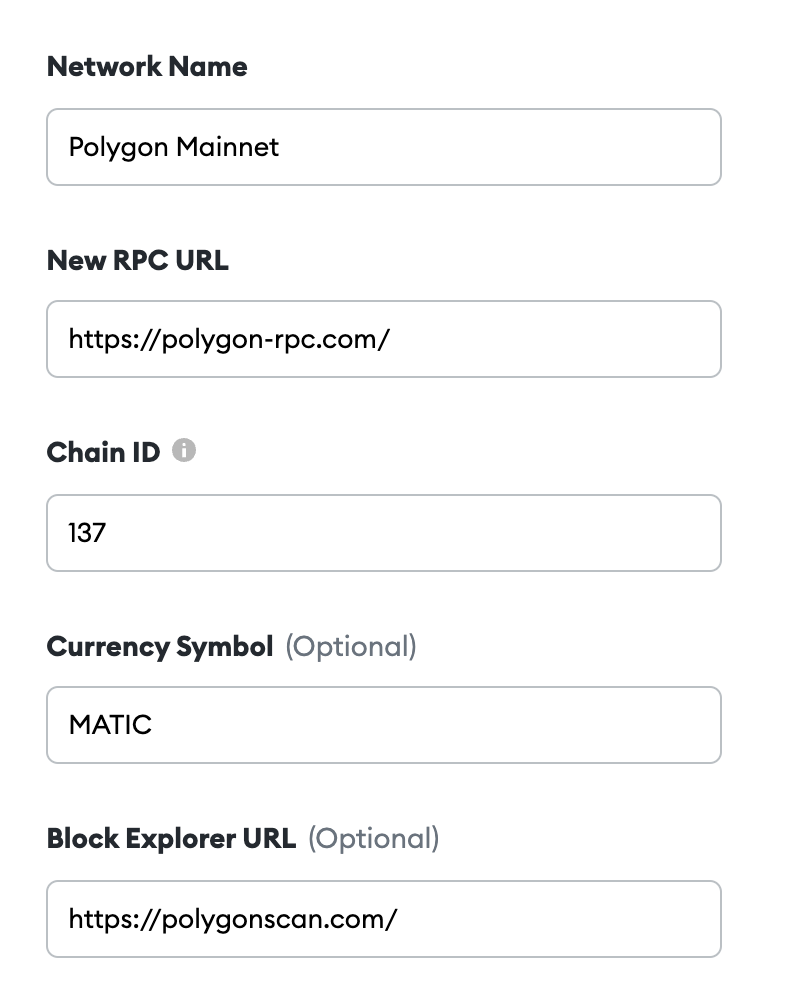
Open MetaMaskClick “Add Network”
Enter the following values

2. Add Polygon tokens to your wallet
Remember, we’re deploying our contract to Polygon Mainnet so we need to pay any associated transaction costs with real tokens.
The Polygon network uses MATIC tokens. Let’s add these tokens to our wallet so we can pay deployment fees!
You have two options here:
Purchase $MATIC on an exchange and transfer it to your MetaMask wallet (I followed this guide using crypto.com)Use a faucet like https://matic.supply/ (same concept as getting test ETH for our Rinkeby deployment but this faucet gives us real $MATIC tokens)
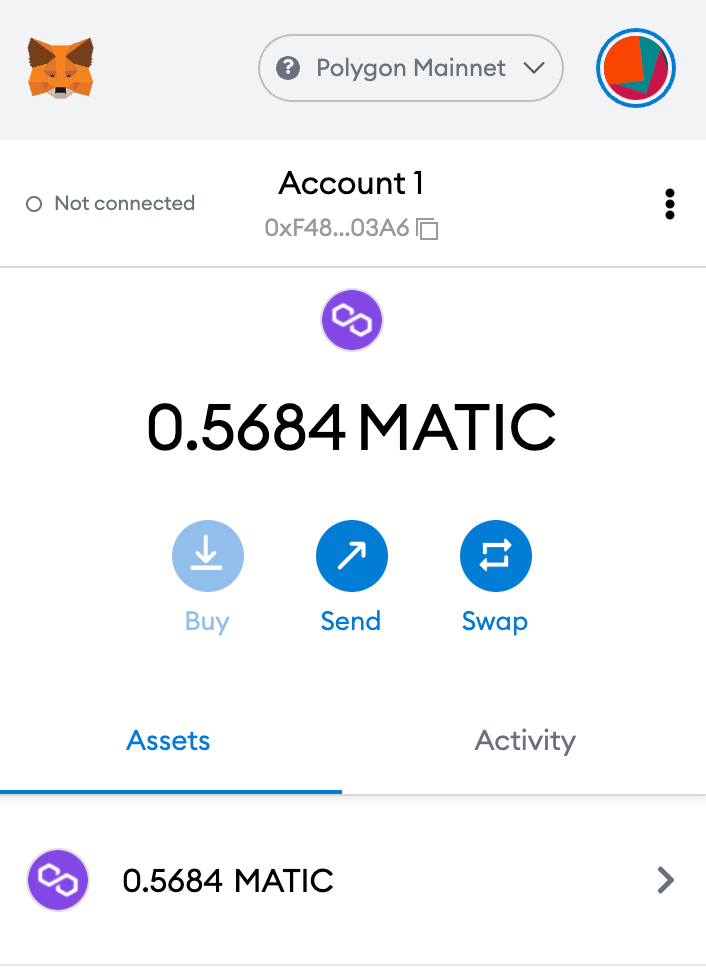
Once you’ve completed these steps, your MetaMask wallet should look something like this. That’s real money!

3. Create a Polygon node/app
The buildspace tutorial took us through creating a Rinkeby app on Alchemy. We’ll do the same for this deployment — but with Polygon.
Go to the Alchemy dashboard (https://dashboard.alchemyapi.io/) and click “Create App”.
Enter a name/description and set the “Environment” to “Production”, “Chain” to “Polygon”, and “Network” to “Polygon Mainnet”.

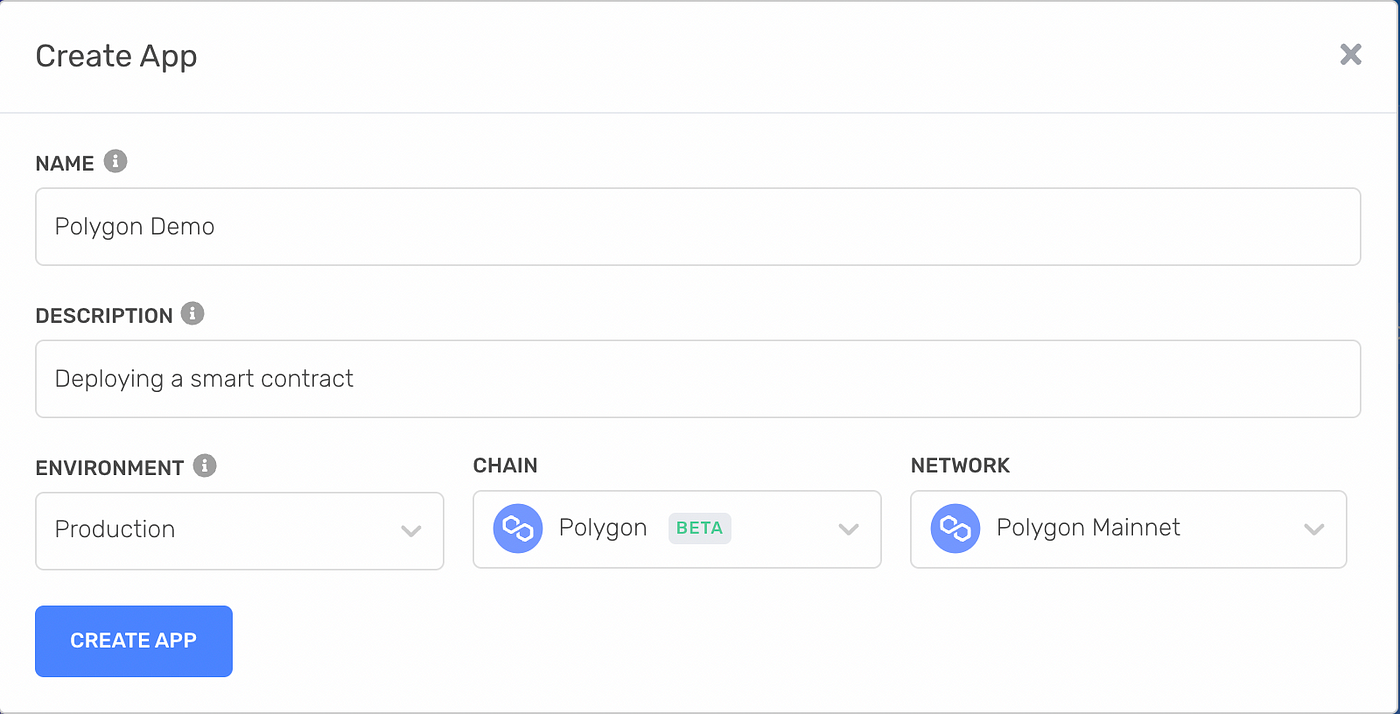
Sweet. Now click “Create App” to finish creating your Polygon node. You’ll be redirected back to the alchemy dashboard.
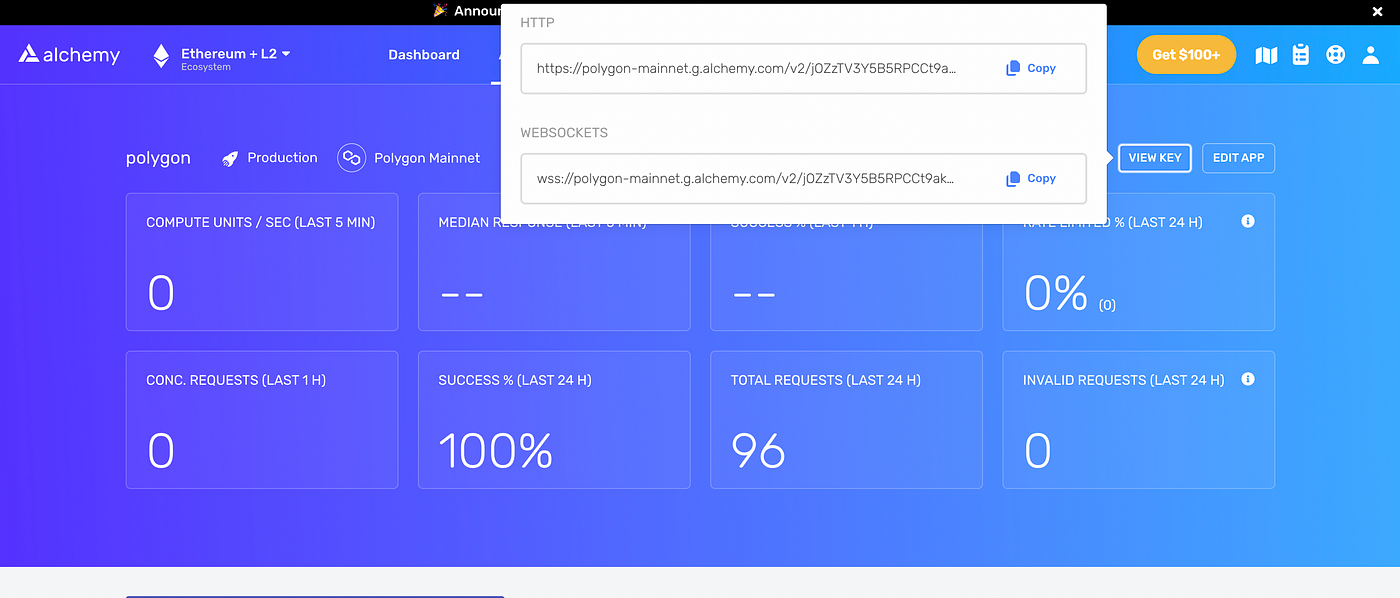
Finally, click on your newly created app in the dashboard, click “View Key” in the upper right hand corner, and copy the HTTP url — we’ll come back to this in a second.

4. Edit your Hardhat config
In our buildspace project, we created a config file to manage our hardhat Rinkeby deployment. We’ll modify this config file to deploy to Polygon Mainnet.
Replace the content of the hardhat.config.js file with the following gist:
https://gist.github.com/timpark0807/ea26377b716d132f2d8fb9caac348587
Replace "ALCHEMY_URL" with the url generated in the previous step and "PRIVATE_KEY” with your wallet’s private key (remember, don’t commit your private key anywhere!!).
5. Run compile/deploy commands
Alright we’re almost there!
First we need to compile our smart contract.
Open your terminal and run:
npx hardhat compile
Nice, we’re finally at the moment we’ve been waiting for — deployment!
Run the deployment script:
npx hardhat run scripts/deploy.js --network matic
You should see an output like this after running these 2 commands…

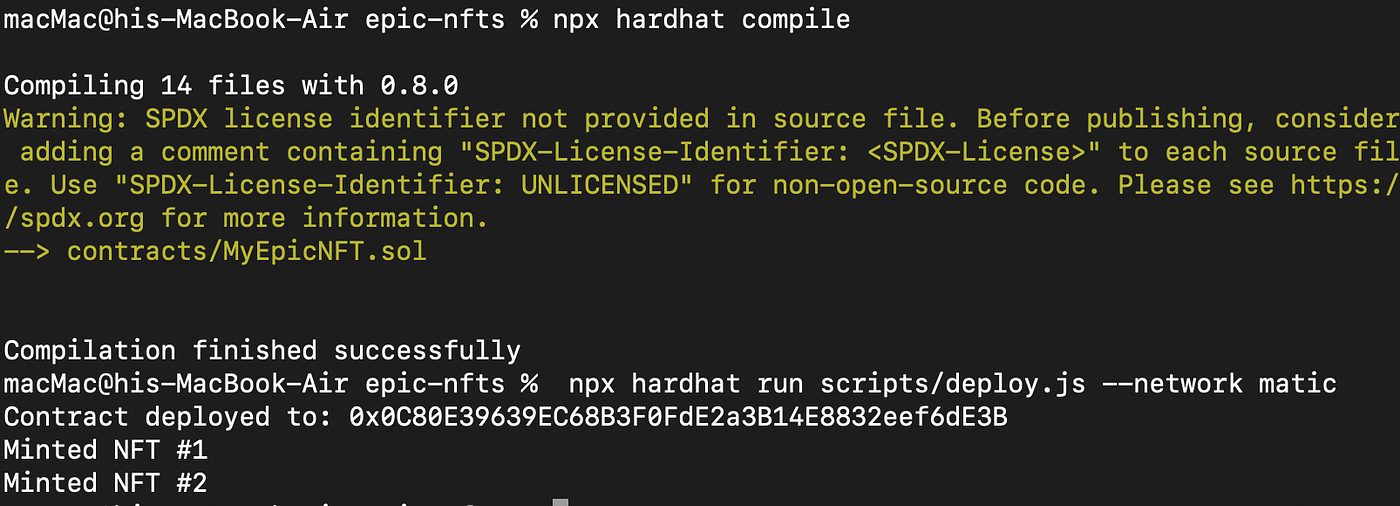
Boom! You just compiled your contract and deployed it to the Polygon Mainnet.
You used real life money to deploy your smart contract onto a real main network. These transactions are being broadcasted, verified, and recorded on the actual Polygon ledger!!
View your NFTs
All the hard work is done. Now let’s see what we’ve minted by searching the contract address on OpenSea.io.
(Notice we’re not using testnets.opensea.io. It’s on the actual OpenSea website!!)
Your smart contract is deployed and minting NFTs on a real, live chain!!!!
You can also look up the address on Polygonscan.com to view the actual transaction.
Summary
You’re live on the Polygon Mainnet! You can now say you’ve deployed a smart contract to a real, live, distributed blockchain.
Congrats on taking the next step as a web3 developer.


0 Comments