
How to create a Dynamic NFT Minter bot using Solidity and Python?
This is the last article in a series to learn you how to create a dynamic NFT bot. We will use Python and pyTelegramBotAPI to create a simple Telegram bot that can create dynamic NFTs for us.
What we are going to do in this article?
- Create a new bot using @botFather
- Install pyTelegramBotAPI and initialize project
- Implement message handlers and responses
Let’s start with @botFather to create a new bot. All you need to do is start the bot and then send the command \newbot. After that, you should just set up some info about your bot, and then you will receive a token that you need it for the next step.
Now, we have to install Telebot (synchronous and asynchronous implementation of Telegram Bot API). Use this command to install Telebot: (pip install pyTelegramBotAPI)
After install Telebot, you need to set your bot’s API_KEY. Copy the token from BotFather and use this command: (export API_KEY= “token”). Then, create a new file in your directory and name it as main.py. In this file, we’re going to implement message handlers.
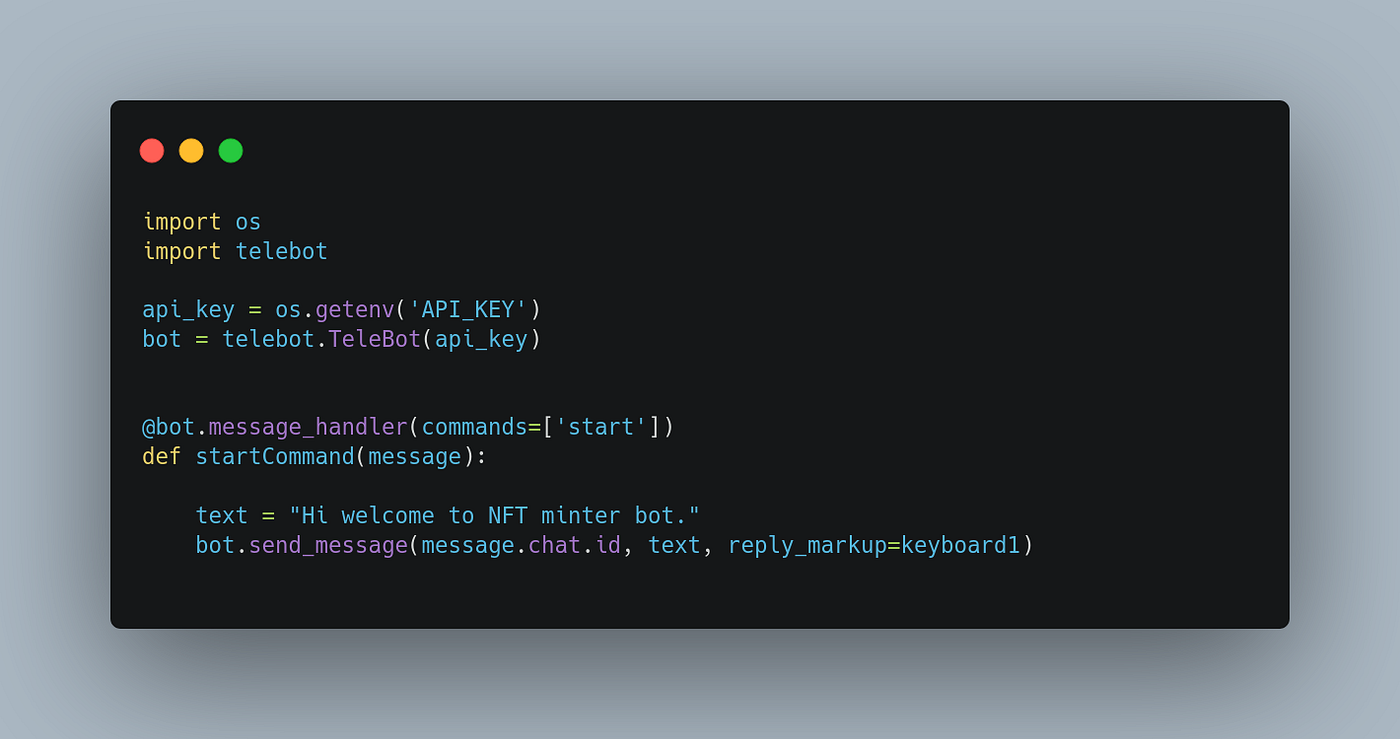
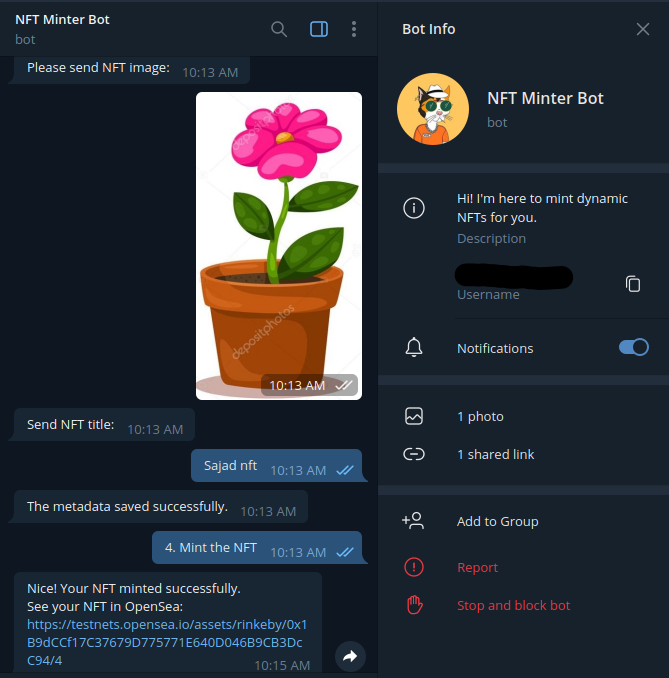
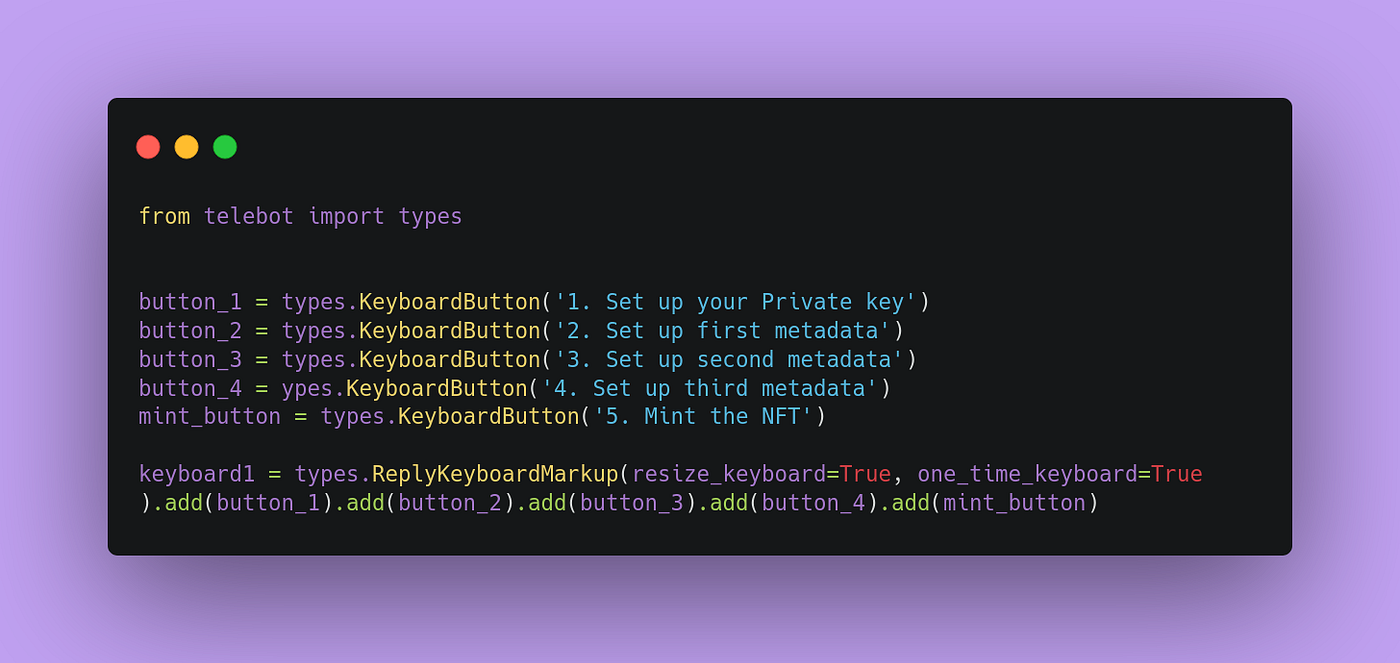
Now, we have to import telebot and os then create and initialize the bot. After that, write a function to handle the start message. Then you can add a keyboard button to your project. Create a new file and name it buttons.py and then set up a keyboard button like the image below.
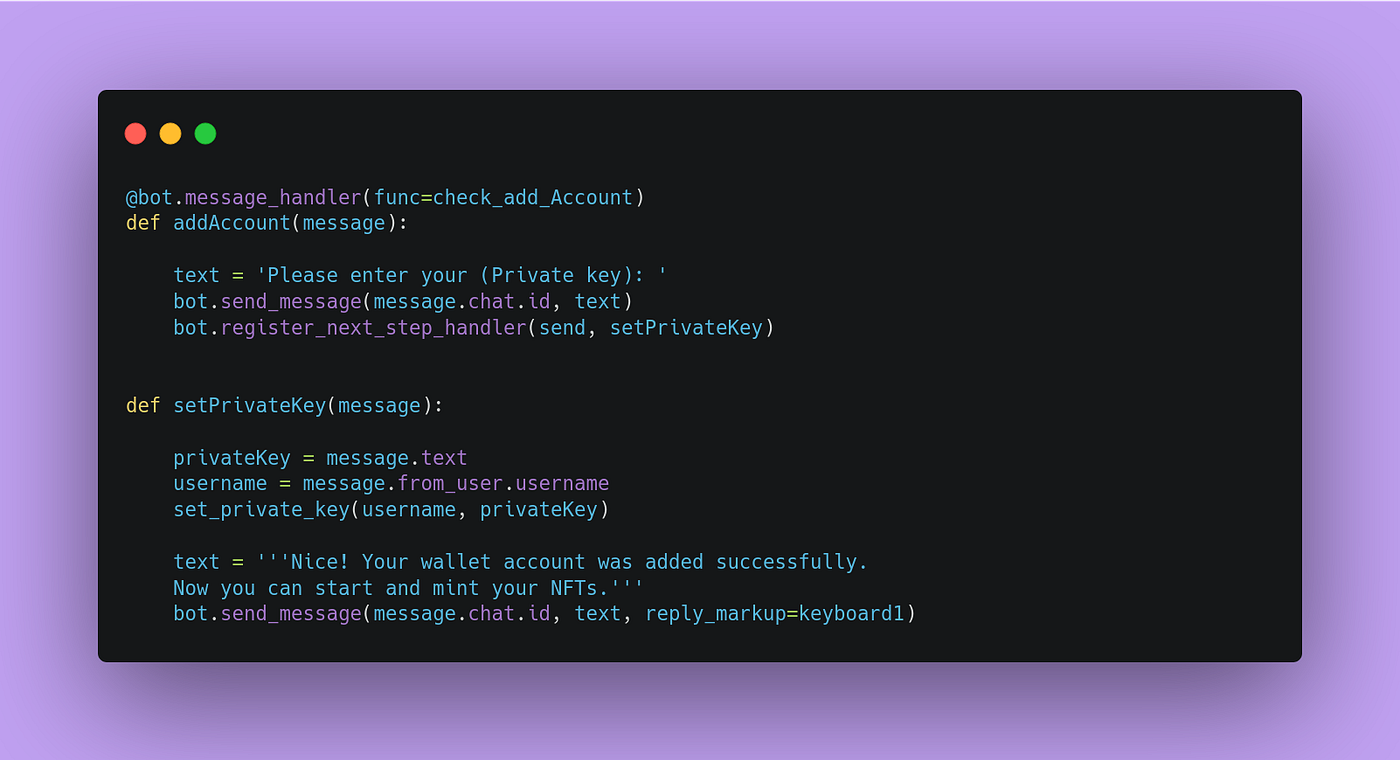
As you see, each user need to set up a private key and three different metadata to mint their own NFT. For each metadata, we will get image, name, description from the user, convert it to a Json file and store it on IPFS. Then we will save all the metadata URLs and private key on mongodb (you can use any other database) and when user wanted to mint the NFT, we will retrieve URLs from mongodb and mint save all the URLs on the blockchain and mint NFT.
In the next step, we should implement 5 different functions to handle the messages.
- Get private key (add wallet account)
- Get name
- Get description
- Get image file
- Mint NFT
Now, you can easily write all other functions as same as the image above, or also you can check complete source code here: Link
After that, you should write a specific function to check the messages and send a response to the user.
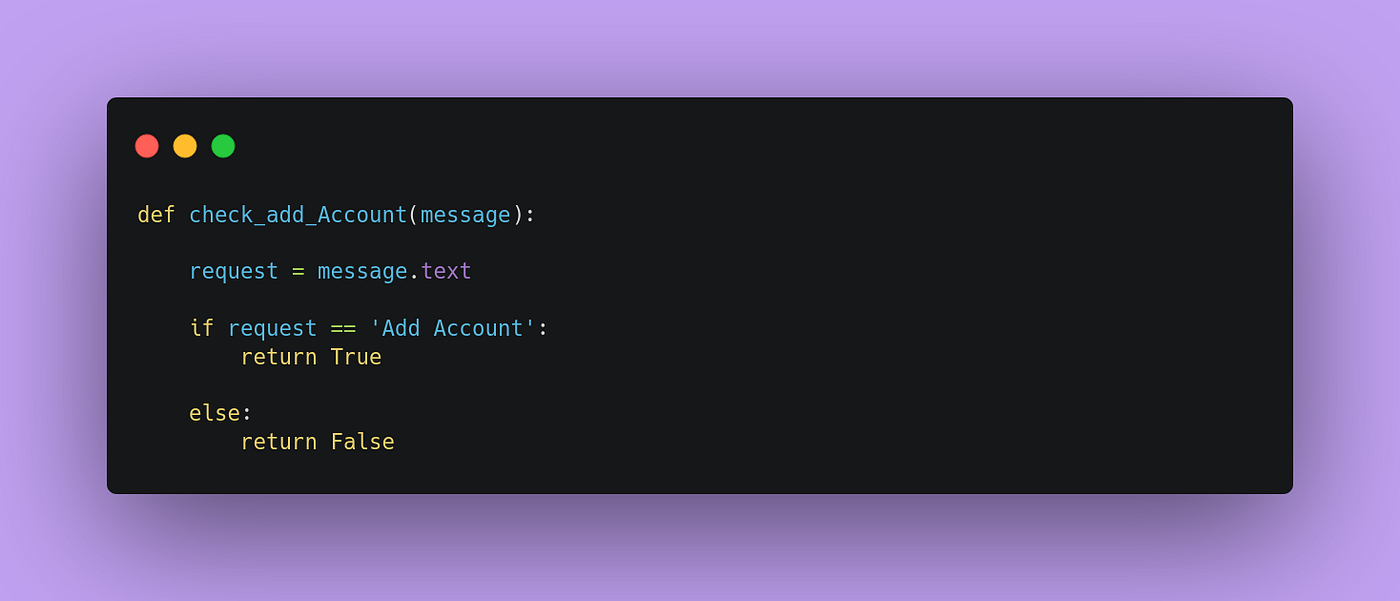
As you see in image above, we get a message from the user and check if it was equal to add account, then (addAccount in main.py) function will run. Now you can go ahead and implement all other functions easily.
I also added some new features in this project. You can check the complete source code here: Link


0 Comments