
How to setup a Raspberry Pi Security Camera Livestream
After we are able to record individual images with (USB) cameras / webcams, we also want to view live pictures. This can either take place on the smartphone or on a PC fom outside of the home network. For this purpose, we configure the Livestream of the Raspberry Pi security camera. The great thing is that almost every USB camera (also webcams) can be used. Depending on placement, e.g. a camera without an infrared filter can be useful to enable better night shots.
Equipment
The missing IR filter ensures a higher light sensitivity.
If we want to connect a USB camera, our Raspberry Pi must obviously have a free USB port. However, we can also use the official camera, which is available in two versions:
- Standardversion in green (US* / UK*), which has 8MP, and the like. Videos in 1080p can record. Since an infrared filter is installed, it is particularly suitable for daylight recording or for places with sufficient light irradiation.
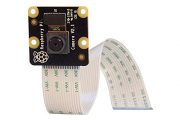
- NoIR Version in black (US* / UK*): The specifications (resolution, etc.) are the same, but no IR filter is installed, which makes records with bad light conditions better. This is especially recommended for dark scenes.
Both cameras can be directly connected via the CSI connector on board, which means that no USB port is used. The newer Zero models (from generation 2) now also have CSI ports.
Alternatively, any USB Webcam (US* / UK*) can be used as long as the corresponding drivers for Linux are available. However, this is the case with almost all newer cameras. If our Raspberry Pi does not have an integrated wifi adapter*, we may need one more because a network or Internet connection is unavoidable.
Preparations for the Livestream
Before we enable the stream of our Raspberry Pi camera or USB Webcam, we need to update the packages:sudo apt-get update
sudo apt-get upgradeThen you can install the Motion tool, which makes our Livestream possible.
sudo apt-get install motion -yIf everything has worked so far, the camera can be connected (if not already done). If you are using a USB webcam, you can check if it has been detected:
lsusb
If no special drivers are required, all connected video devices / cameras should be displayed with the following command:
ls /dev/video*
If you are using one of the official camera modules, it is important to do the following so that the camera is displayed immediately (preferably by autostart):
sudo modprobe bcm2835-v4l2If only a single webcam / Raspberry Pi camera is connected, by using
/dev/video0 the device should be specified. If you have several devices connected, you have to select the device to transfer the stream.
Configure the Raspberry Pi Livestream
For the next steps, in which we set some settings, wee need to look at the camera details:v4l2-ctl -V
For my USB Webcam I got the following output. We will immediately specify the information for the resolution, etc. in the configuration file.
pi@raspberrypi:~ $ v4l2-ctl -V
Format Video Capture:
        Width/Height  : 640/480
        Pixel Format  : 'YUYV'
        Field         : None
        Bytes per Line: 1280
        Size Image    : 614400
        Colorspace    : SRGB
        Flags         :
So let’s edit Motion’s configuration file:
sudo nano /etc/motion/motion.conf
The following lines have to be adjusted (the variable can be searched with CTRL + W, the bold values have been changed):
# Start in daemon (background) mode and release terminal (default: off)
daemon on
...
# Restrict stream connections to localhost only (default: on)
stream_localhost off
...
# Target base directory for pictures and films
# Recommended to use absolute path. (Default: current working directory)
target_dir /home/pi/Monitor
The following lines are optimal and should also be changed (we have read them out previously):
v4l2_palette 15     # Nummer aus der Tabelle davor entnehmen, 15 enstpricht YUYV
...
# Image width (pixels). Valid range: Camera dependent, default: 352
width 640

# Image height (pixels). Valid range: Camera dependent, default: 288
height 480 # Maximum number of frames to be captured per second.

# Valid range: 2-100. Default: 100 (almost no limit).
framerate 10
Save with CTRL + O and close with CTRL + X. Further options (port, etc.) can also be adjusted afterwards (requires a reboot). The brief description of the settings is however very revealing.
Now we only have to activate the daemon so that we can run the service afterwards:
sudo nano /etc/default/motionHere we replace “no” with “yes”, after which it should look like the following text:
start_motion_daemon=yes
Now we have to create the folder, which we have previously specified as the storage location for the captured frames, and give it the necessary writing rights:
mkdir /home/pi/Monitor
sudo chgrp motion /home/pi/Monitor
chmod g+rwx /home/pi/Monitor
Then we can start the service:
sudo service motion start
Raspberry Pi Surveillance Camera Livestream Test
In order to test whether our camera is really sending live images, we basically have two options: One way is simply to use the browser (Mozilla Firefox, Chrome, etc.) and the name of the Raspberry Pi followed by the port (default: 8081). If you have not changed the hostname and port, you should be able to see the stream: http://raspberrypi:8081/ (Alternatively, the local IP address can be used, such as 192.168.1.51:8081).
Some older browsers do not support this stream (Internet Explorer :-D). Those users may choose the Livestream e.g. on the VLC Player. To do this, simply open the VLC Player and specify in the menu under “Media” -> “Open Network Stream” (CTRL + N) the above address. This is also possible in the VLC Player for smartphones and tablets (Android, Apple): Select “Open Media Address” in the menu and the IP address including port.
Depending on the specified Framerate (specified in the configuration file) the image is better or not. Of course, your camera must also support the framerate. If, for example, the camera can send a maximum of 10 frames per second, it does not matter if more are set in the configuration.
Source: Raspberry Pi Site


10 Comments
casc
ReplyDeleteExcellent post. I really enjoy reading and also appreciate your work about fire alarm systems. This concept is a good way to enhance knowledge. Keep sharing this kind of articles, Thank you.
ReplyDeletegreat work. thanks for sharing. To choose the right security camera system, homeowners should consider the unique needs of their property I would recommend i3 Camera
ReplyDeleteYou are giving such interesting information. It is great and beneficial info for us, I really enjoyed reading it. Thankful to you for sharing an article like this.WB Sales and Service
ReplyDeleteYou are giving such interesting information. It is great and beneficial info for us, I really enjoyed reading it. Thankful to you for sharing an article like this.WB Sales and Service
ReplyDeleteWow, this article is awesome wish to see more like this. Thanks for sharing such information. You can check this out too Security Camera Installation Toronto. Thank you.
ReplyDeleteVery well written article. It was an awesome article to read. about WB Sales and Service Complete rich content and fully informative. I totally Loved it.
ReplyDeleteVery well written article. It was an awesome article to read. about WB Sales and Service Complete rich content and fully informative. I totally Loved it.
ReplyDeleteI found decent information in your article.Surveillance Camera Installation Toronto I am impressed with how nicely you described this subject, It is a gainful article for us. Thanks for share it.
ReplyDelete